Table of contents
- Why using raw files?
- What's are raw files?
- Converting to standard graphics formats
- Raw conversion
- Saving raw files?
Why using raw files?
If you are using a digital camera to produce images for professional use, or want to get the best possible digital images as an amateur, you are almost certain to have bought a camera that produces images in a 'raw' format and be using this for the majority of your work.
In a 5Mpixel camera it doesn’t matter whether your image is JPEG or RAW if all you’re going to do with it is display it on the web or print in small format – there’s more than enough detail to handle these situations. But if you consider heavy cropping of your images (for example to combat the zoom limitations) or large prints (bigger than A4), then all the detail you can get becomes very precious.
All photos are originally shot as RAW. If you select a different format, the RAW image is converted in-camera to the desired format. The in-camera interpolation algorithm is a compromise between reasonable quality of output and the time it takes to convert the RAW image into the final RGB map. It has to work in a limited amount of memory and has to be quick enough for the camera lag to be minimal, and it has to be good for all the images.
When you shoot in RAW, the camera stores the image as it was captured by the sensor, and all the conversion takes place in your computer after the image has been downloaded. The difference is that at this stage you can afford the time to run less efficient but more sophisticated algorithms, and experiment to select one that gives you best results for a particular photo. Typically the algorithms differ in their ability to produce clean edges and handling of noise – depending what your photo contains, some will produce better results than others.
When you store images in RAW format you can take advantage your camera's hidden dynamic range; you can access tones that may be obscured or lost when images are stored in a standard file format such as a JPEG-- the default for most digital cameras.
JPEG is a lossy compressed format that sacrifices a small amount of information to achieve a large savings in storage. But it is not this information loss that concerns us here; it is the loss of tonal levels that takes place when the image sensor's digital output is converted to any standard 24-bit color file format; JPEG is merely the most common. Image sensors in high quality digital cameras have a bit depth of at least 12; they have 212 = 4096 discrete tonal levels. Standard 24-bit color files have a bit depth of only 8; they have only 28 = 256 discrete tonal levels. Tonal levels are lost in the conversion.
What are the advantages of raw format?
- All your conversions are done on a fast powerful computer at your convenience.
- Images can be 'fixed' in ways which would be very difficult without the raw sensor data.
- You get the full range of data from the sensor.
- Without sharpening or compression you have not 'lost' any data.
- You can change your mind about some of the picture settings after you have taken it.
- RAW conversion on a computer, rather than in the camera, enables you to achieve optimum tonal quality.
Is there a downside?
- Raw files are bigger
- JPEGs are quick and easy to use.
- Special software is required to do the conversion.
- Not all cameras support raw formats and may offer reduced functionality when using raw.
What's are raw files?
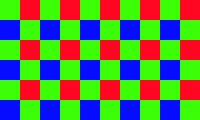
All digital cameras designed for professional use can produce 'raw' images, that is files that contain the actual data produced by the photo sensors in an appropriate digital format. Most digital cameras use an array of photo sensors under a filter matrix which results in each sensor recording either red, green or blue light intensities. Usually this is what is known as a Bayer matrix, in which every other sensor records green, and the other cells in alternate rows are either red or blue. So a typical pair of lines across a sensor looks like this:
Colour depth
RAW is the only format in which the photos are recorded with 12 bits per pixel of colour information, for each of red, green and blue channels. JPEG format give you only 8 bits of colour depth. This means that in RAW we have up to 4096 distinct values of data in each channel, as compared to only 256 in the other formats. While the immediate difference is quite hard to notice, the post-processing can quickly lead to posterization, especially in very light shades. Having this extra depth available makes photos more resilient to post-processing.
For example if the original photo is too dark, you can make it much lighter without noticeable degradation of detail level. Making it 4 times brighter still gives you 1024 levels of detail, while on a 8-bit photo it will reduce down to 64. It’s true that noise is amplified together with the detail, but it looks much subtler when there’s enough colour depth.
Why Extra Green?
Lets think of a very small sensor, just 200 sensors wide and 100 high (I find it a lot easier to work with small numbers.) For each row of it, there will be 100 green values, 50 red values and 50 blue values. Taking the sensor as a whole, this gives 100x100 green, 50x100 each of red and blue, that is 10,000 green, 5,000 red and 5,000 blue from the 20,000 light cells on the chip.
Better results are obtained with more green values because the human eye is considerably more sensitive to green light than to red or blue, and so the green is simply more important in our view of anything.
Bayer array interpolation, demoisaicing algorithms
The mathematics of working out an image composed of pixels, each with a red, green and blue value from the single cell values can be simple or complex depending on the algorithm chosen. We can think of overlaying a grid of pixels on top of the grid of cell values, and then for each pixel using some averaging process to work out a value for the three colours. If we choose a pixel grid with the same number of pixels as light sensors in the original chip, then there is one 'real' value for each pixel, and two that require interpolation.
Each of the true green cells has two nearest red values and two nearest blue values at right angles, and a simple averaging of these would give useful results. Any red or blue cell has four close green cells, and averaging of these could also give a likely green value. A missing red or blue value for these cells could be found by averaging the four diagonal cells of the appropriate colour. However, more reliable results can be obtained by more complex interpolation methods. Interpolation is unreliable at the edges of the sensor as there are no values to average, so typically the image size is cropped by a few pixels compared to the raw sensor pattern.
For further informations read this article:
Converting to standard graphics formats
16-bit tiffs
Simple interpolation of values from the raw file would result in each pixel being represented by 36 bits (12 for each colour) giving four and a half bytes per pixel. Unfortunately there is no 12-bit per channel file format and each colour has to be represented in 16 bits by adding blank values (padding) to the file. This would result in each pixel requiring 6 bytes, but the 16-bit file could contain all of the original information in the raw file as well as interpolated data.
Although possible, this does result in large files. A 6 Mp camera image results in a 36 Mb 16-bit tiff file, and you cannot fit very many of those even on a 1 Gb flash card. So cameras generally only output 8 bit tiffs, although software that processes raw images on your computer (where storage is relatively cheap and available) can usually output all the information in a 16 bit tiff format.
Normal 8-bit tiffs
Outputting pixel values to a tiff file involves further processing of the data in order to produce a smaller 8-bit file that reflects the various settings of the camera, such as white balance, sharpness, contrast etc. The 8-bit files are mean to be 'ready for use' with the correct appearance. However, these files contain only 8 bits for each colour and the camera generates 12, so one third of the information has been eliminated. This is not a great problem if the images are low contrast, correctly exposed and the correct options have been chosen during shooting. The chances of one of these three being true are good, but all three is rather less likely, and thus further loss will usually occur if the files are saved in this smaller format.
Even so, 8-bit tiff files are also larger than raw files, in fact roughly roughly twice the size, because of the extra interpolated data they contain. While a raw file needs only 12 bits per sensor cell, the tiff file has 24 bits per pixel.
Avoid JPEG if you can
Jpeg is also an option on most cameras. It involves the same data loss as the 8-bit tiff, followed by an extra loss due to the compression used. Unless there is a need for rapid transmission of data over the telephone system, jpeg is best avoided. There may be occasions on which the generally faster camera processing times and smaller file size in camera are important enough to override the quality loss, but the general rule should be to shoot and save raw, then convert to jpeg if necessary.
Raw conversion
Gamma correction
Digital sensors (both CCD and CMOS) are linear. That means the voltage generated in each pixel, and hence the pixel level emerging from the A-to-D converter (the device that converts the sensor output to discrete bits), is proportional to exposure-- to the light energy reaching the pixel. But neither human vision nor CRT monitors are linear. Hence the color spaces (rules that map pixel levels to visible colors) used for standard image files are intentionally nonlinear. The luminance represented by a pixel is not proportional to the pixel level. Luminance in a print or monitor is related to pixel level by the following simplified equation,
To obtain the pixels, the raw output of the image sensor, which is proportional to exposure, must be converted to a file with a standard color space using the inverse of the above operation.
Gamma is the exponent of the equation that relates luminance to pixel level. Every color space has a characteristic gamma. Gamma = 2.2 for sRGB, which is the default color space for Windows, the World Wide Web, and most digital cameras. sRGB has a color gamut that approximates typical CRT monitors. Another popular color space is Adobe RGB (1998), which has a slightly larger color gamut. It also has gamma = 2.2. ( Older Macintosh computers have a default gamma of 1.8, but newer models seem to have switched to 2.2.) In the illustration below, the first process-- converting light energy (RAW data) to file pixels-- is shown on the left. The second process-- converting file pixels to print or display-- is shown on the right. The two processes are complimentary; when you combine them you get a straight line.

Gamma correction is one of several functions of RAW conversion-- the process of converting the output of an image sensor to a standard file format, such as JPEG or TIFF. Depending on your camera's Storage or Quality setting, RAW conversion takes place inside the camera, immediately after the exposure, or afterwards on a computer.
It should be evident from these graphs that RAW conversion compresses pixel levels representing high luminance and expands pixel levels representing low luminance. This means that the converted file, with gamma = 2.2, has relatively fewer pixel levels in the highlights and more in the shadows. This turns out to be an advantage when human vision is considered.
White balance
Digital cameras are used with light sources that have a wide range of color temperature. This must be addressed when the RAW conversion is performed. Otherwise the image may look too blue or yellow. Most cameras have several custom White Balance settings in addition to an automatic setting that estimates the White Balance based on the spectral content of the image. Automatic White Balance algorithms work well most of the time, but they can fail for unusual subjects, for example, where a strong color dominates the scene. When you save an image in RAW format and convert it later, you can make use of your calibrated monitor to get White Balance just right.
Saving raw files?
Using eLynx SDK, you can save raw file, as 16-bit grey format with Bayer matrix, in compressed tif format. When loading that kind of tif file Bayer matrix is retrieved.
For the code sample we save the image using the jpeg format:
void processRaw()
{
  cout << "Convert a raw CCD Bayer image to RGB color space jpg" << endl;
  cout << ".load NIKON-D70-v2.00.NEF" << endl;

  ImageVariant image;
  ImageFileInfo info;
  image.Load( "../../datas/NIKON-D70-v2.00.NEF", &info);
  if (!image.IsBayer()) return;

  cout << "." << (image.IsValid() ? "VALID" : "INVALID")
       << ", format " << elxToString( image.GetPixelFormat() )
       << ", size " << image.GetWidth() << "x" << image.GetHeight() << "-"
       << image.GetBitsPerPixel() << "bits"
       << ", Bayer " << elxToString( image.GetBayerMatrix() )
       << endl;

  cout << ".remove the bias value of the CCD: ";
  uint32 bias = 0;
  info.GetBias(bias);
  cout << bias << endl;

  if (0 != bias)
  {
    const float dark = bias / float(uint16MAX);
    const EBayerMatrix bayer = image.GetBayerMatrix();
    image.SetBayerMatrix(BM_None);
    image.Sub(dark);
    image.SetBayerMatrix(bayer);
  }

  cout << ".get the full range resolution for a better interpolation" << endl;
  image.Normalize();

  cout << ".demosaicing using the Adaptive Homogeneity-Directed method" << endl;
  image.ChangeToColor(BCC_AHD);

  cout << ".apply white balance from the camera settings" << endl;
  float cr,cg,cb;
  info.GetWhiteBalance(cr,cg,cb);
  cout << ". r=" << cr << " g=" << cg << " b=" << cb << endl;
  image.Balance(cr,cg,cb);

  cout << ".adjust gamma with 2.2" << endl;
  image.AdjustGamma(2.2);

  cout << ".apply Gaussian blur before sharpening" << endl;
  image.ApplyGaussian(0.5);

  cout << ".apply sharpen" << endl;
  image.ApplySharpen(2.0);

  cout << ".change resolution to UINT8 before saving" << endl;
  image.ChangeResolution(RT_UINT8);

  const uint32 quality = 70;
  cout << ".save as output/fromRaw.jpg with compression quality at " << quality << "%" << endl;
  ImageFileOptions options;
  options.SetQuality(quality);
  image.Save("output/fromRaw.jpg", ProgressNotifier_NULL, &options);

} // processRaw
Output:
Convert a raw image to jpg
.load NIKON-D70-v2.00.NEF
.VALID, format Lus, size 3039x2014-16bits, Bayer BGGR
.normalize to have full range
.convert from Bayer to RGB
.adjust white balance
.adjust gamma
.apply Gaussian blur before sharpening
.apply sharpen
.change resolution to UINT8 before saving
.save as output/fromRaw.jpg with compression quality at 70%
Raw sample file is available here: NIKON-D70-v2.00.NEF
raw file converted to jpg |